Friday, January 15, 2016

Ipsy Glam Bag January 2016


For only $10 a month, you can receive five full size or deluxe sample sized products as well as a cute makeup bag once every month! I love my subscription to Ipsy and am SO excited to share what I was given this month in my Glam Bag! 

This was the super cute makeup bag that was given this month! These are such a cute thing to collect and to have nearby when you need a small bag to carry products in.


V-Luxe 
Eyelashes With Mini Lash Glue
This was one of my favorite things I received! Eyelashes are always a good thing to have to enhance any eye look.


J Cat Beauty 
Blinkle Shimmer Eye shadow 
An eye shadow is another amazing thing to get. Especially this one! I swatched it on my hand and it was so pigmented. I am so excited to use it!


Beau Gachis Paris 
Smudge Eye shadow Brush
One of the most amazing things about Ipsy is that you can get a makeup brush included in it! I am so excited about this eye shadow brush. It is so firm and you can tell it is such great quality.


theBalm Cosmetics 
Mr. Write Eyeliner
This is such a beautiful Copper eyeliner. It went on so smoothly and definitely an exciting thing to get in my bag!


tucker ashley 
Advanced Peptide Eye Complex
This is said to target dark circles, puffiness, and fine lines while moisturizing the delicate eye area. This is also another great thing to have!
Use the link below to subscribe to the Ipsy Glam Bag yourself


Sunday, January 10, 2016

Eyeshadow Tutorial : Natural Daytime


This eye look has got to be one of my favorites! It is so simple yet it adds so much to your appearance. The browns in the crease give your eyes a look of dimension while making your eye color pop! It is so simple and easy to achieve. 

1. I started off, of course, priming my eye lids with the Mac Paint Pot in the shade Soft Ocre. I then applied my transition shade onto my crease. I used the shade Lt. Brown from the Lorac Pro 2 palette. I made sure to blend this as well as I could using a fluffy brush.


2. I began to darken up my crease by using various shades of brown in the Morphe 35O palette. Try and keep the eye shadows on your crease only. If it gets a little messy and falls onto your lid, that is fine because we will be cleaning the lid in a little bit.


3. This is the only tricky part in this look. I used a very small and flat eye shadow brush and dipped it in my Mac Paint Pot. You can easily use a very light concealer for this. It will give you the same effect. I began to carve out my lid using the product on the brush. You can pretend it is an eye shadow and just place it on your entire lid from the inner lid to the outer lid. Keep this away from your crease. This will give the effect of a "cut crease". 


4. I took the shade Buttery from the Anastasia Beverly Hills Self Made palette and packed it on top of where we just applied the Paint Pot/concealer.


5. For eyeliner, I made one simple line above my lash line using the Nyx Collection Noir Liquid Liner.


6. I applied the same shade I used for my transition shade (Lt. Brown from Lorac Pro 2) to my lower lash line. I didn't want to leave my lower lash line empty. After this, I applied mascara to my upper and lower lashes and blended my crease a tiny bit more. Blending is key - always remember that!


I paired this eye look with a brownish nude lipstick. I feel like what you choose to wear on your lips can always complete a very nice eye shadow look! This beautiful eye shadow can be worn on any occasion. It is so natural and perfect for the day time. If you want to wear this at night, you can always use darker shades in the crease. Thank you for reading! 

P.S. 
Excuse my eye brows! I need to pluck them desperately.

♥♥♥

Sunday, January 3, 2016

Eyeshadow Tutorial : Smokey Champagne


So as I said in my last post, I was given a camera for Christmas. I wanted to test it out and try and put it to good use by doing a step by step tutorial of a very simple and not so drastic eye look. I know that as I use it more and more, the quality of these tutorials will get better. 


This look is a very simple night time look that can be done for many occasions. The dark colors will bring out almost any eye color and make your eyes pop! Here is a step by step tutorial with pictures to help you recreate this look. 


1. I started by priming my eyelids with Mac's Pro Longwear Paint Pot in the shade Soft Ocre. This ensures that your shadow will stay in place all day. I then took a fluffy eye shadow brush and went in with the shade Lt. Brown from the Lorac Pro 2 palette and blended it in throughout my crease. This is called your transition shade. It helps blend all the other shades you will be putting on your eyelids. 


2. Once the transition shade is down, I applied the shade Hot Chocolate from the Self Made palette by Anastasia Beverly Hills just in the inner and outer parts of the lid with a dense shadow brush. I blended that color onto the crease with an E25 brush from Sigma. I kept the Hot Chocolate color very light because if I went in too dark then, it's easy to make your eye have a black eye appearance and we don't want that. I made sure to keep the center part of my lid free of color so that the champagne color I will be 
adding will pop more. 


3. When step 2 is finished, you will then want to find a nice, light shimmery color to apply to the lid. I used a flat and very dense shadow brush to apply the color Pink Champagne from that same Anastasia Beverly Hills palette I used in step 2. I packed that color on to make it look how I wanted. This is where I went in and slowly added more of that Hot Chocolate shade to make it darker and to my preference. Make sure to go in slowly and don't just throw it on very darkly. It's a lot harder to make a color darker than lighter.


4. Once I was satisfied with the way it looked, I took my Nyx Collection Noir Liquid Liner and made a thin line very close to my upper lash line. If you are new to eye shadow, I wouldn't recommend this eyeliner to you. I would recommend a felt tip eyeliner because it's a lot easier to get the hang of and gives you the same look. 


5. I applied a few coats of mascara using my L'OREAL Telescopic Mascara on only my upper eyelashes for now. When you have a full look on your lid, you don't want to leave your lower lash line empty. So, I applied the same Hot Chocolate shade under my lower lash line with a small pencil brush. The flash of my camera diffused the harshness of the color on my eyes so it looks lighter than it really was. I then took a brown pencil eyeliner and lined my lower waterline. I finished the look with putting mascara on my lower lashes. (I didn't get a picture of these last two steps)


I wore this look for New Year's Eve and thought it was beautiful. Wearing fake eyelashes or having naturally thick and full eyelashes would really complete this eye shadow look but because I have neither, I couldn't show you. But, if you do, I would love to see how it turned out! Also, if you want to recreate this look, there is no need to use the same products I did. You can always use what you have at home and find shades similar to what I used. I hope you enjoyed reading this! 

Sunday, December 27, 2015

My Makeup Collection : Eyeshadow Palettes

Many Youtubers and bloggers have been starting a series on their channel/blog about their makeup collection. Once or twice a month, they will show and review all of their products in one makeup category such as foundations, blushes or mascaras all in one video. I find these videos so helpful and interesting and its inspired me to start the series on my blog. 

Today, I am going to be writing about the eye shadow palettes I own. I hope that if you are looking to find an eye shadow palette, this blog post will help guide you into knowing what you are looking for. 


Urban Decay Book of Shadows IV

When I first started getting into the makeup world, I bought this at ULTA and thought it was the coolest thing. I used it a lot a few years ago but not much anymore. Urban Decay eye shadows are great and I definitely used to get a lot of use out of this.

Tarte Tartelette
This palette is definitely one of my favorites. Matte eye shadows will always be my go to shadows and this palette gives me what I want and more. The shadows blend so easily and each row of colors correspond so well with the other colors in that row. I think its a great palette for beginners.
LORAC Pro 2 Palette
I bought this one about a year and a half ago and again I love it. I don't use it as much as I used to but I really should start up again. The colors are so beautiful. You get a wide variety of mattes and shimmers that work so well with one another. I definitely recommend. The quality of LORAC eye shadows are out of this world.
Urban Decay Naked 2
This was the second palette I bought when I was learning about eye shadow and it was my favorite for a while. Bootycall will always be my favorite color to highlight my brow bone with and I use at least one color out of this palette almost everyday.
Morphe 35O
Now, for my favorite palette by far. I have done a review on this already so I won't say much but I really don't think I will every find another palette that could ever compare to this one.
Too Faced Semi-Sweet Chocolate Bar
I got this last week from one of my friends so I don't have much to say just yet but let me just say that it literally smells like chocolate so that's a huge plus right there!


UPDATE
I had a very blessed Christmas this year. I spent it with so many people that I love and care for and it was an all around great time. This week was very hectic so my post today wasn't the best it could have been but I promise my blog will be advancing from here. I was given a camera for Christmas and when I start to get the hang of it, I will be trying to post makeup or DIY tutorials on looks and ideas that I love. I also have an ULTA haul coming up and would love to take requests. I hope everyone had a very merry and blessed Christmas!
*DUPE ALERT*
 One of the most sought after Mac lipsticks is called "Velvet Teddy". It is a beautiful nude color that would look amazing on any skin tone. With it being almost $20, I could never get myself to buy it although I did research and found a very inexpensive duplicate to the color "Velvet Teddy". Wet N Wild's MegaLast Lip Color in "Bare It All" is such a beautiful color that is very similar to the Mac lipstick. It is only $2 which is an extreme difference from "Velvet Teddy" which is $17. I use the Wet N Wild lipstick almost every day and it really feels and presents itself like a high end lipstick. I highly recommend it.
http://thestylescrapbook.co.uk.gridhosted.co.uk/tag/mac/

Sunday, December 20, 2015

Ipsy Glam Bag December 2015


As a Christmas present from my grandma, I received a subscription to the monthly beauty subscription box called Ipsy. For only $10 a month, you receive five full size or deluxe sample sized products as well as a cute makeup bag. This was my first month getting the bag shipped to my home and I am in love with what I was given and am very excited for my Ipsy bags that are to come in the future.


Clark's Botanicals

Deep Moisture Mask


Pacifica
Power of Love Natural Lipstick


Marc Anthony Hair Care
Coconut Oil & Shea Butter Deep Conditioning Treatment


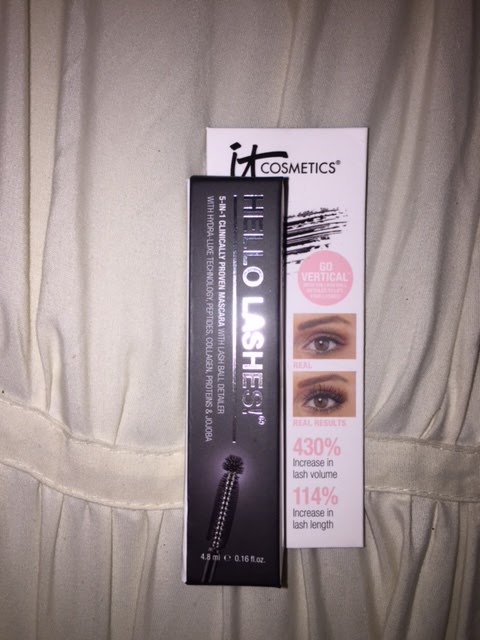
IT Cosmetics
Hello Lashes Clinically Proven 5 in 1 Mascara


Elizabeth Mott
Thank Me Later Eye Shadow Primer


Use the link below to subscribe to the Ipsy Glam Bag yourself

Sunday, December 13, 2015

Must Haves I Can't Live Without ♥

Trying new makeup products is one of my favorite things to do. I can always find a reason to buy something new. But, sometimes I find myself going back to products I have had for a long time because I just can't get enough of them. I wanted to share some of those must have items I just can't go without!


Coty Airspun Loose Face Powder
I have done a review on this a few posts back. This has been my favorite face powder for the past couple of months. I have a feeling I will continue to love this for a while! The price is amazing as well.


L'OREAL Telescopic Mascara
I have tried plenty of mascaras and not one of them has made my lashes look as great as this one. This product lengthens and separates my eyelashes like crazy. The wand is very firm and skinny which really grabs at each lash lengthening and coating with product. It is also very affordable!


Revlon ColorStay Foundation
This is my favorite foundation of all time. I loved Estee Lauder Double Wear foundation for a long time and I find the two very comparable. I choose to buy the cheaper option which is this one.


Anastasia Brow Wiz
I don't even know what I can say to fully explain how much I love this brow pencil. It makes my eyebrows look phenomenal everyday! The tip is very fine and tiny which makes each stroke look like one of your own eyebrow hairs. It comes with a spooly at the end to blend out the marks you have made. It is such a great product I greatly recommend it.


Maybelline Instant Age Rewind Concealer
This is another product I don't know how to fully describe how amazing it is. After using this for quite some time, I can't imagine spending more than $10 on a different concealer. It blends out like a dream and doesn't ever crease for me. 


Sunday, December 6, 2015

Beauty Blender VS. Real Techniques Sponge


I have been a very strong lover of the Beauty Blender for quite some time now. I would use it everyday to apply any cream product that I was putting on. It was better than any brush I owned and I never thought I would stop using it until I tried this Real Techniques Miracle Complexion Sponge.

Now, first let me say that the two sponges are very similar. I have found that they apply makeup the same way and the outcome looks the same, but what drew me to the Real Techniques sponge was by far the price. The price of a Beauty Blender is around $20.00 while the Real Techniques sponge was $7.00 at ULTA. That's a $13.00 difference when you are basically buying the same product. 

I have also come to love the shape of the Real Techniques sponge better than the Beauty Blender. The flat side of the Real Techniques sponge is perfect to get right underneath the eyes and around the nose. It also has a point at the end to get even more hard to reach places. 


While I am going to say that I love the Beauty Blender, the Real Techniques Miracle Complexion Sponge is the way to go. For the quality of this sponge, the price is something you can't beat. I would highly recommend this to everyone out there who wears cream products everyday.

*SALE ALERT*

ULTA is having a Buy One Get One 50% Off for these Real Technique Miracle Complexion Sponges until December 24th. Go get yours today!